There’s something magical about taking an object that’s been quietly living in a drawer or storage for the last decade — or, let’s be honest, three — and giving it a new purpose. That’s exactly what happened when I decided to make some doily wall decor with embroidery hoops. It started with my mom and me diving into a tub of memorabilia stored in the basement. That’s when we came across bags of doilies. Doilies my great-grandmas had made.
With the idea of downsizing in mind- that’s why we were digging in the first place- we said we need to find something to do with these, or we are getting rid of them. We thought there was no point in having them stored away and taking up space if we didn’t even know they were there. That’s when we got to brainstorming. We hated to get rid of them so that when I had a “maybe I’ll try this” moment.
Why Doilies? Why Hoops? Why… this?
Doilies are basically the introverts of the craft world. They’re delicate, quiet, and usually hiding under a vase, drawer, or storage, like they’re avoiding eye contact. But they’re also beautiful — intricate little pieces of art that someone once poured time and care into. And embroidery hoops? They’re the extroverts. They frame things, demand attention, and say, “Look at this. No, really, look.”
Putting the two together feels like matchmaking for home décor.
Plus, there’s something deeply satisfying about taking something old (or thrifted, or inherited, or found in a box labeled “miscellaneous memorabilia”) and giving it a new life. It’s intentional, it’s personal, and it’s a tiny achievement you can hang on your wall and admire every time you walk past.
What You’ll Need for Your Doily Wall Decor
- A handful of doilies — vintage, new, mismatched, or all perfectly coordinated
- Embroidery hoops in various sizes (I used 14.5″, 10.5″, 8.5″, 6.5″, 4.5″)
- Scissors
- Twine
- Hot glue gun
- A bit of patience and a willingness to stretch fabric like you’re trying to win a carnival game
- Optional: ribbon, twine, beads, or whatever little personality pieces you want to add
How I Made Mine (And How You Can Make Yours Without the Mild Chaos)
When I made my doily wall decor, my mom and I started by narrowing down which ones we really liked based on their color and design. We split them up and off home I went. There was one really large one that I loved, but it had seen better days. My guess is it had been used on the dinner table and had gotten some stains. I took it home too, just in case there was something I could do with it.
After a few months of them sitting around at my house…I finally got around to looking at them again. My goal was to take inventory of what I needed from the craft store. I shuffled through and picked out some I liked and thought looked good together. I quickly jotted down how many hoops, sizes (small, medium, large), hot glue sticks, etc.
Next, I was off to the craft store…UGHH!!!…why didn’t I measure my doilies before I went!? Don’t make my mistake; grab a measuring tape and measure them! I thought I could eyeball the hoop sizes until I got there, and there were so many different sizes! I grabbed a few of what I thought but ended up making a second trip to get it all! Click Here, if you want to avoid the craft store and order as you measure.
Note: When measuring, you will need to allow some fabric to loop through to the back of the hoop. Purchase a hoop about 2″ smaller than the diameter of the doily (Hoop thickness is shy of a half inch). If the hoop is more than 2″ smaller, that is okay; it will just make it a little easier to pull tight!
Now it was time to pretend that I had a strategy and put them all together. But it worked, so now I’m calling it a method.
Method:
- Start by laying your doily over the smaller hoop. Center it as best you can. If it’s off-center, don’t panic. This is DIY, not surgery.
- Then, place the larger hoop over top. It may sound easier than it is, but do not fret; you will get it! Make sure you can see the edges of the doilies on the back side of the hoop.
- Next, tighten the hoop. Pull the edges of the doily gently until it’s taut. You want it snug, like a fitted sheet that almost cooperates.
- OPTIONAL – Trim the excess. I did not do this step! I wanted to keep them whole in case I wanted to change my decor and take them out of the hoops someday. Totally up to you if you want to cut away the extra fabric around the back. I was able to tuck the fabric up behind, and it is not noticeable.
- Repeat with your other hoops. Mix sizes, mix patterns, mix textures. The charm is in the variety. I decided I wanted a few more hoops, so remember that large stained one? Yeah, I decided to cut it up, adding five hoops and discarded the stained areas.
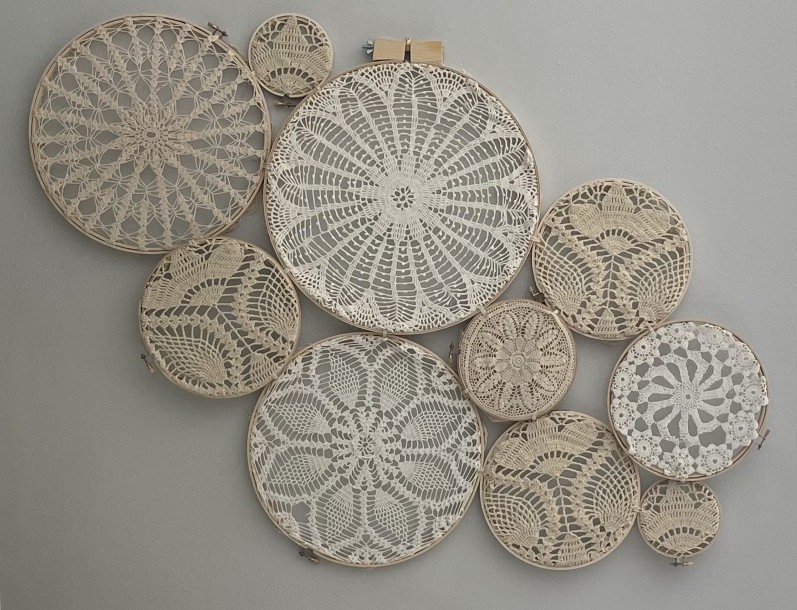
- Arrange them on the FLOOR/TABLE first. This is where the intentional living part comes in. Play with the layout and layering until it feels balanced and meaningful. Mine ended up looking like a little constellation of lace — imperfect but lovely.
- Tip 1: The floor/table are capitalized because I had arranged them just perfectly on the guest bed before thinking it through, that I didn’t really want to hot glue on the bed. Don’t make my mistake and lay them out where you’d be okay using hot glue.
- Tip 2: If you make the same mistake, snap a pic so you can move it and put it back together. The picture is also helpful if you find a layout you like but still want to experiment. This way you can compare more easily or go back to the layout you like best
- Now hot glue and twine. – I used just a little bit of hot glue to hold the hoops in place before I wrapped twine around them. Then I used just a dab of hot glue to hold the twine.
- Lastly, hang them up. Use twine, ribbon, or simple nails (I used a nail). Step back. Admire. Adjust one slightly. Step back again. Admire more.
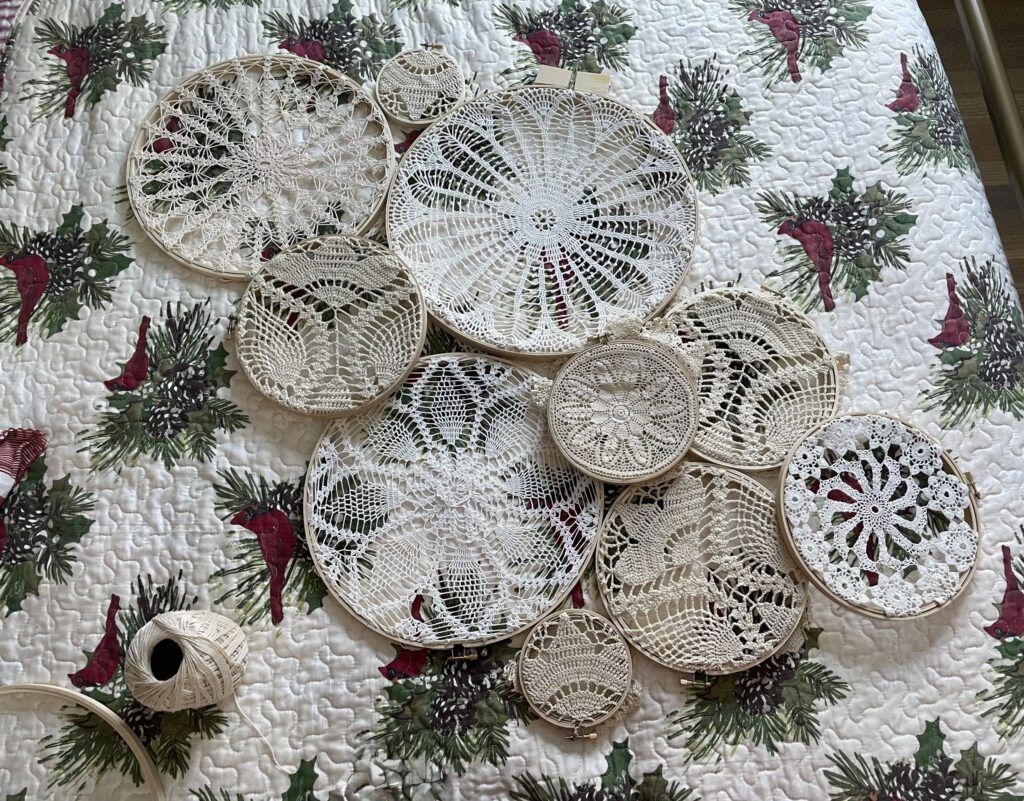
Image of my layout after realizing I was going to have to move it off the bed.
Making It Personal & Purposeful
The beauty of this doily wall decor project is that it’s more than decor. It’s a moment of creativity. It’s reclaiming something old and choosing to make your space feel like you.
As a result, my doily wall hanging reminds me that small achievements matter. That slowing down to make something with my hands is worth it. That intentional living isn’t always about big life shifts — sometimes it’s about choosing to create something beautiful on a random Tuesday afternoon.
And when guests come over and say, “Oh wow, did you make that?” you get to smile and say, “Yes, actually,” while pretending it didn’t involve one doily that absolutely refused to cooperate.
Final Thoughts on the Doily Wall Decor
If you’ve been craving a project that’s simple, meaningful, and just a little whimsical, this is your sign. Gather your doilies, grab your hoops, and make some doily wall decor. Not perfect — just purposeful.
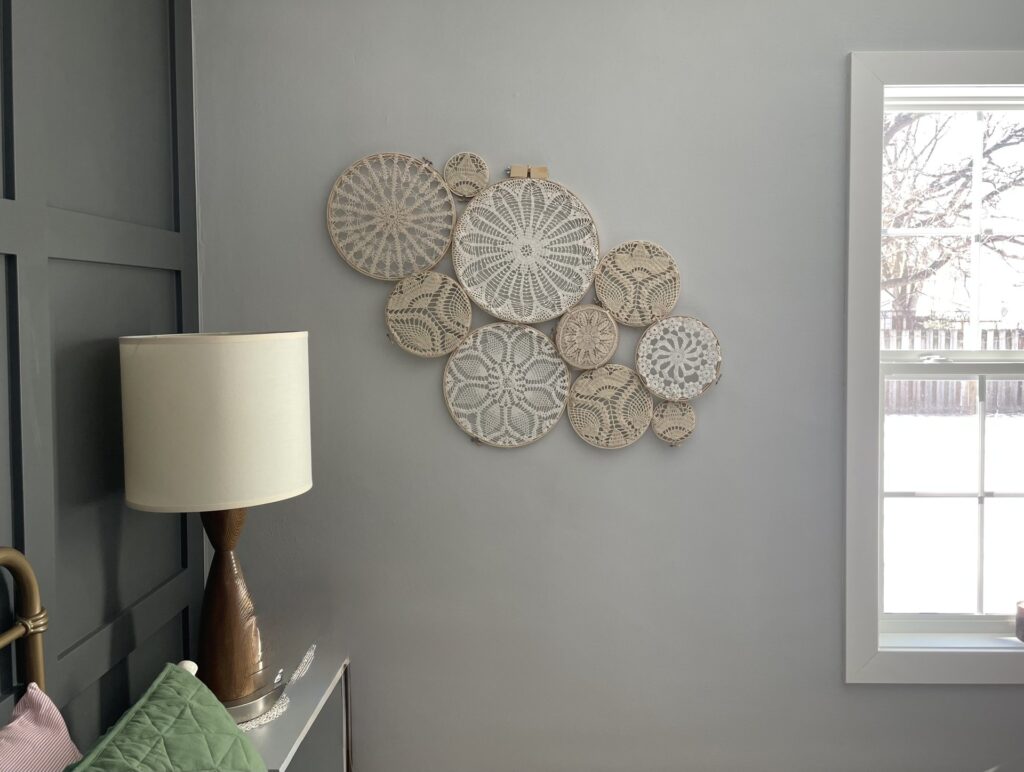
Here is my finished doily wall decor hanging. Surprisingly, it somehow turned into one of my favorite little reminders that intentional living doesn’t have to be complicated. Sometimes it’s just thread, hoops, and a little stubborn determination.
Supplies for Doily Wall Decor:
This post contains affiliate links. As an Amazon Associate, I earn from qualifying purchases. This means that if you click on an affiliate link and make a purchase, I may receive a small commission at no extra cost to you. Thank you for supporting me!

- Natural material : These embroidery has natural textures and colors, giving the embroidery hoops an elegant appearance and a touch of nature. The surface is smooth and ensuring comfort during use
- Multiple sizes(approx.): 4 inch (10cm), 5 inch (13cm), 7 inch (17cm), 8 inch (20cm), 9 inch (23cm) and 10 inch (26cm) with the six different sizes to suite your needs
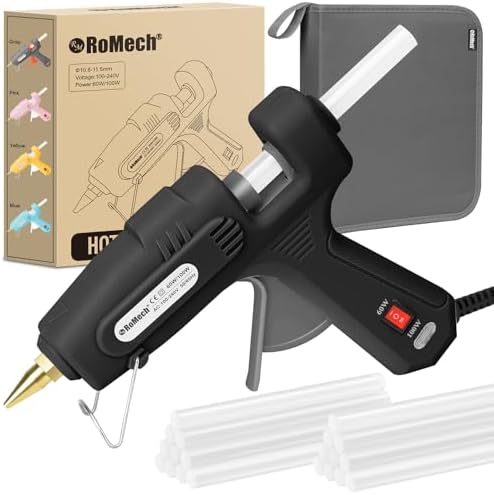
- Dual Temperature Switch: RoMech hot glue guns offer dual temperature settings, 60W at 300°F for bonding delicate craft m…
- No-Drip Copper Nozzle: Even heat distribution prevents stringing and mess, keeping adhesive flow smooth and steady acros…
- Standard Stick Size: Includes 21 high-viscosity adhesive sticks at 7/16″ D × 5.9″ L, compatible with most full size hot …

- 【SMART&CASUAL’S NEW ARRIVAL】Natural Cotton Butcher Twine String. Dimension: 2 mm (Thickness) 600 Feet (Length) (183M app…
- 【FOOD GRADE MATERIAL】High-quality natural cotton material, with features of good strength, bright color and soft touch.
- 【KITCHEN&CRAFTS】A must have item for daily, a good helper around your house. For kitchen, confidently be used for Roasti…